Monday, November 16, 2015

One Pan Honey Garlic Chicken, Potatoes, and Broccoli - Freezer Style

I just made a really good chicken dish! I'm normally not a huge fan of baked chicken breast because it seems to always come out a little dry. BUT THIS. So juicy, and so flavorful!

Original Poster: Damn Delicious

Instead of showing how I cooked someone else's recipe to perfection, this post I'm going to talk through how I can make it a freezer meal! (Note the beautiful Snapchat caption filled with lies)

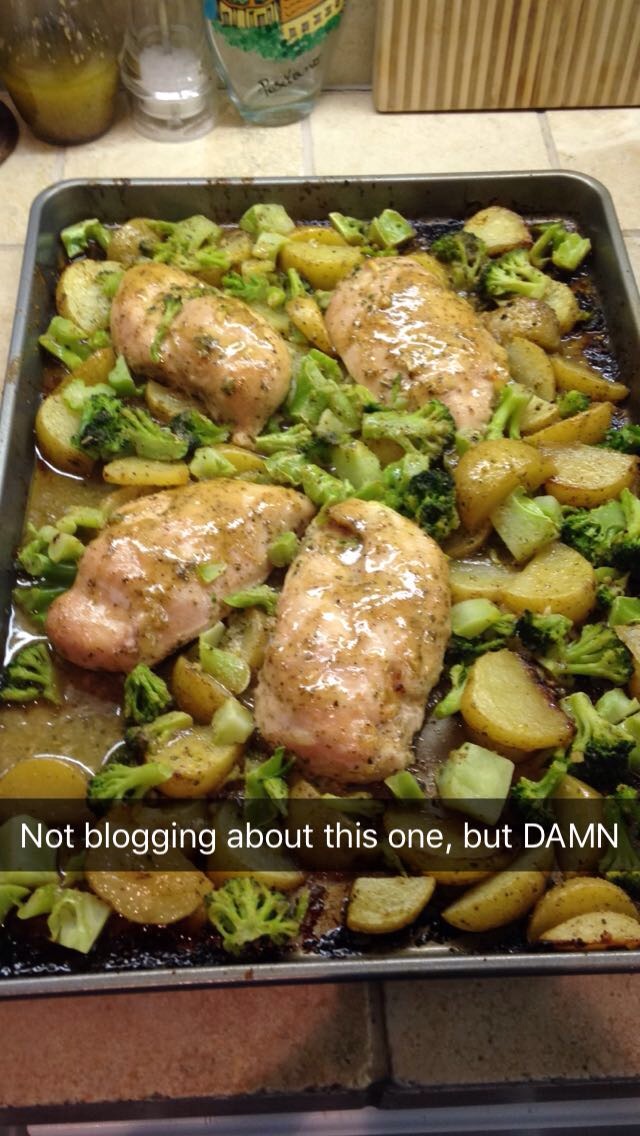
...DAMN I lied to my snap friends. That's ok though. 

Freezer meals are beautiful creatures that save you time, money, and energy. This is especially important for me and Jud, because medical school is a big ole bitch.

Here are the ingredients and instructions, per the original poster:

"Ingredients
3 tablespoons olive oil, divided
2 tablespoons unsalted butter, melted
2 tablespoons honey
2 tablespoons brown sugar
1 tablespoon Dijon mustard
3 cloves garlic, minced
1/2 teaspoon dried oregano
1/2 teaspoon dried basil
Kosher salt and freshly ground black pepper, to taste
16 ounces baby red potatoes, halved
4 boneless, skinless chicken breasts
24 ounces broccoli florets*
2 tablespoons chopped fresh parsley leaves

-Preheat oven to 400 degrees F. Lightly oil a baking sheet or coat with nonstick spray.
In a small bowl, whisk together 2 tablespoons olive oil, butter, honey, brown sugar, Dijon, garlic, oregano and basil; season with salt and pepper, to taste. Set aside.
-Place potatoes in a single layer onto the prepared baking sheet. Drizzle with remaining 1 tablespoon olive oil and season with salt and pepper, to taste. Top with chicken in a single layer and brush each chicken breast with honey mixture.
-Place into oven and roast until the chicken is completely cooked through, reaching an internal temperature of 165 degrees F, about 25-30 minutes.* Stir in broccoli during the last 10 minutes of cooking time. Then broil for 2-3 minutes, or until caramelized and slightly charred.
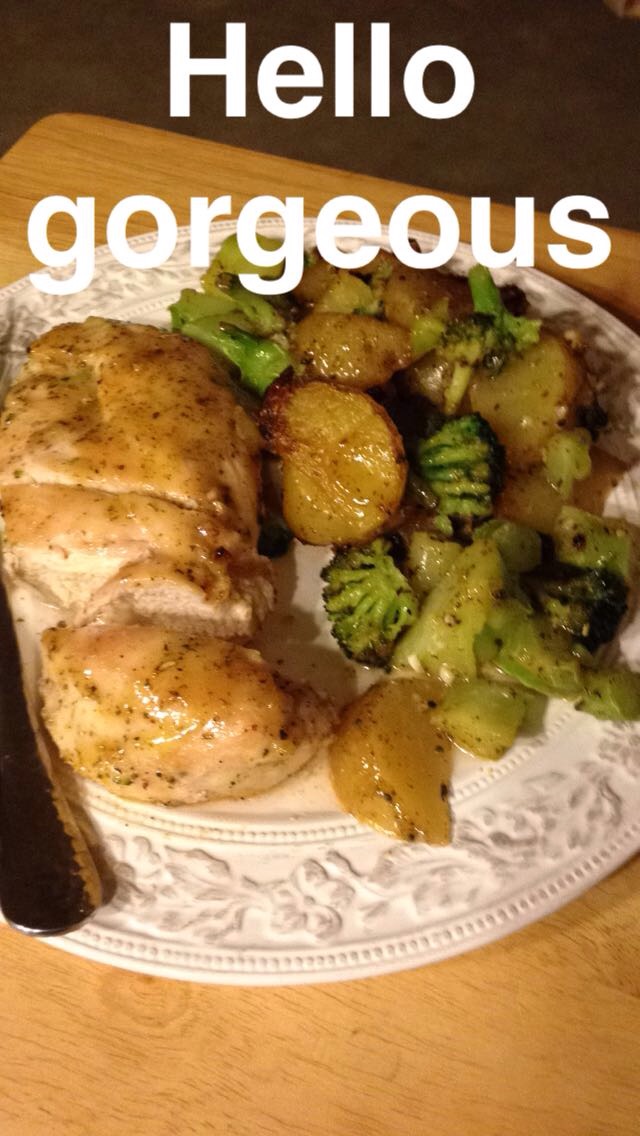
-Serve immediately, garnished with parsley, if desired.

Instructions
Notes
*24 ounces broccoli florets is equal to about 5 cups. 
*Cooking time will vary depending on the size and thickness of the potatoes. "


  • To make this bad boy a "freezer meal," what I'm going to do is make enough of the glaze sauce for 2 dinners. Put half in a gallon freezer bag, and repeat in another bag. Then I'll stuff in 4 chicken breasts into each freezer bag. Mix it around nicely. Lay both bags flat in the freezer. When I defrost the chicken, the glaze will act as a marinade and hopefully it will be SERIOUSLY JUICY. 

  • For the potatoes, to make this really easy on myself for cooking night, I will slice up my potatoes and freeze them too! 
    • Unfortunately I learned from my friend Google that freezing potatoes raw is a bad idea. It changes the texture of the potatoes and makes them grainy. Lucky for us, Google also had an answer for that. It's called blanching. 

Me too, Blanche. Me too. 

    • How do we do it? Like this:
      1. Wash your taters. Cut them how you want to cook them.
      2. Water blanch for 3-5 minutes depending on size.
"Blanching (scalding vegetables in boiling water or steam for a short time) is a must for almost all vegetables to be frozen. It stops enzyme actions which can cause loss of flavor, color and texture. Blanching cleanses the surface of dirt and organisms, brightens the color and helps retard loss of vitamins. It also wilts or softens vegetables and makes them easier to pack.  
Blanching time is crucial and varies with the vegetable and size. Underblanching stimulates the activity of enzymes and is worse than no blanching. Overblanching causes loss of flavor, color, vitamins and minerals. Use one gallon water per pound of prepared vegetables. Put the vegetable in a blanching basket and lower into vigorously boiling water. Place a lid on the blancher. The water should return to boiling within 1 minute, or you are using too much vegetable for the amount of boiling water. Start counting blanching time as soon as the water returns to a boil. Keep heat high for the time given in the directions for the vegetable you are freezing."
                         3. Let them cool in some ice, then drain.
                 4. Pack em up for the freezer!

  • Next we have the broccoli. Buy frozen broccoli. ;)

On COOKING DAY:

Defrost the chicken & potatoes in the refrigerator the night before. 
Take out your broccoli once you start cooking. 
Then cook by the directions in the recipe! 
EAZY 


Easy Peasy Marinara Sauce

This simple recipe is vegan, gluten free, sugar free, and all other good things that people think is healthy! You could even make it salt free, but that would probably compromise the taste. But you do you, boo!

so let's get to:

Cooking {without} Class


Anything that requires marinara can use this REALLY EASY recipe. And, I think it's super good! 
You can also double the recipe and freeze some for a future recipe. 
Easy never looked so good and tasted so tasty

Me looking PIST that Jud was taking my picture while I cooked.
I'm gonna hit him with my big ole spoon. 
Ingredients:

1 28 oz Can of Crushed Tomatoes
1 15 oz Can of Diced Tomatoes (This can vary, but I'll cover it, don't worry)
3 tsp Italian Seasoning (or 1 of each: Parsley, Basil, Oregano)
1 tsp of Salt (you don't have to add if you're trying to go for no sodium added)
1/2 tsp Garlic Powder OR sauté 2-3 fresh cloves before adding the tomatoes
1/2 tsp Onion Powder  OR sauté 1/2 fresh onion, minced
A couple of pinches of Red Pepper Flakes depending on your spicy level

This cannot get any easier for a homemade, healthy marinara! 

1. If you want to do it the "Hard Way", mince your onion and garlic. Sauté. 
  • I sautéed garlic here. No onion. 
2. Add the tomatoes and spices. Stir together. 
  • Let's talk tomatoes: I didn't have crushed or diced tomatoes when I first made this. I did have whole peeled tomatoes and tomato sauce. I "crushed" my whole tomatoes with a spoon in the can and used the tomato sauce. It was perfect. Diced tomatoes would make it chunkier if you're into that.
  • The next time I made it, I doubled my recipe to freeze some for later, "crushed" my whole tomatoes with an immersion/wand blender and used the tomato sauce. It was a little watery because of the doubled sauce, so I added a small can of tomato paste. Then it was perfect. 
3. Cook until boiling, then lower the heat and simmer for at least 20 minutes, up to an hour. 
4. Add to whatever you're cooking! 
Bonus picture of my KITTY CAT HOT HAND THINGY
with meatballs in the background. yum. 


Meatballs Parmesan


This is seriously one of the most delicious meals I have ever cooked! The husband already made me make them again (after we had leftovers). I think this will most def become a fave in the LaGrone house. 

It's Time for

Cooking {without} Class! 


For this meal, I used the beautiful recipe from Hugs and Cookies, an easy peasy Marinara Recipe (that I've shared here), and quinoa spaghetti. 
I have comments on quinoa spaghetti. Check them out here

WHO'S READY TO GET COOKIN?
(me, me, me!)


Our Ingredients: 

For the ballz (lol I said balls) 

1 1/2 pounds ground beef (85% lean)(or leaner if you'd like)
1 cup bread crumbs
1 cup grated Parmesan cheese
2 eggs
salt to taste
1 Tablespoon milk
For the sauce and such:

Sauce of your choice (approx two 24-oz jars)
OR
Easy Peasy Marinara (which has no added sugar and optional salt, and is still great)
Parmigiano-Reggiano or Mozzarella cheese to top 
(plus other cheese like Romano, Asiago, Parm if you'd like)


For me, I made the marinara sauce first so that it could simmer and get really flavorful while I did my other cooking. Again, that recipe is here.


so beautiful

Next (or first if you're using jar sauce) WE MAKE THE MEATBALLS!

If you've never made meatballs, If feel bad for you son. I got 99 problems, but these balls ain't one. 

Meatballs are really fun. It's like adult playdoh that smells ok and tastes really good once they're cooked. I like getting my hands dirty. I especially loooove when I get ground beef under my fingernails. Not. But everything else about meatballs I truly enjoy! 

So for the meatballs, you'll want to 
1. Add all of your meatball ingredients into a large bowl. Preheat your oven to 375.
2. WASH YOUR HANDS DAMMIT
3. Mix it. Use those clean hands! Go a little crazy, but not too crazy - no one wants meat flying around their kitchen, except for the dogs, of course. 
4. Form into balls! Mine were a little bigger than golf balls.
5. Heat up a little oil in a pan, and brown the balls on at least two sides. They turn into a shape that looks like a deflated volleyball after browning. No biggie. Still Delish. They don't have to cook all the way through...they'll finish cooking in the oven!


brown balls 


6. Put a layer of marinara sauce on the bottom of your baking dish. I used my biggest dish, btw.


7. Add all of your meatballs.


8. Pour the rest of your marinara on top of the meatballs.

OH NO Where'd they go!!??
9. Bake covered for 30 minutes at 375. This is a good time to boil your pasta.
10. Uncover, and re-cover WITH CHEESE. Be generous. The world needs cheese. Put her back in the oven and broil for a few minutes until the cheese is nice and melted like so:


I added some fresh basil to the top to make it pretty.
The basil flavor will also seep into the cheese :) 
You're done!!! Enjoy the deliciousness that is MEATBALLS PARMESAN.

On top of spagheeeeeeeetiiiiii, all covered in cheeeeeeze,
I lost my poor meeeeeeeatballllll when somebody sneeeezed.
(there's more to the song, but you gotta ask for it)


Concise Instructions: Mix together meatball ingredients. Pan fry to brown. Cover the bottom of your baking dish with sauce, then place meatballs, then cover with the rest of your sauce. Bake covered for 30 minutes at 375. Uncover and dress the top with LOADS of cheese. Broil for a couple of minutes, until cheese is melted. Serve with pasta, and ENJOY

Thoughts: I obviously LOVED THIS. Judson loved it. That's really all you need to know -- The world's most judgmental eater LOVES THIS DISH YALL.


Saturday, November 14, 2015

The thing about quinoa spaghetti..

So tonight I made dinner (meatballs parmesan). In an attempt to make our meal healthier, I used quinoa spaghetti instead of normal spaghetti. I've had it before. It tastes like spaghetti, it looks like spaghetti, and it pretty much cooks like spaghetti. BUT here's the deal, if you cook it and let it sit in the colander for 20 minutes, it hardens. This makes it no longer "eat" like spaghetti. It clumped together and got a little weird with the texture. My dinner was OBVIOUSLY still delicious, but I just thought I'd share my thoughts about quinoa spaghetti.

tldr: don't let it sit on the counter. cook, then eat immediately.

<3 Frankie

Monday, November 2, 2015

Spaghetti Squash Lasagna

GUESS WHAT TIME IT IS...

Cooking {without} Class


That's right everyone. The time has come (the walrus said), to share my cooking again! 
This week's cooking class is based on a recipe I found on Pinterest...like they all are. 
Here's the link to the original poster: Celiac in the City

So let's get this thing goin, shall we?

FIRST THINGS FIRST YALL: Apron of the day or #AOTD
This picture makes my legs look long. Do not be fooled! Also, I'm wearing my most ~fashionable~ flip flops.
I chose this apron because it reminds me of my MawMaw Cascio, and I'm making Italian food, so it was appropriate! 
Now we can really get this thing rocking. 

Ingredients: 

1 spaghetti squash
1 lb Italian sausage (I mixed spicy & sweet)
2 cups of your favorite pasta sauce
2 tablespoons fresh basil
½ cup ricotta cheese (I used a whole cup)
½ cup shredded mozzarella cheese (again a whole cup, plus topping)
Olive oil
salt & pepper (obviously)
How would you know what the ingredients looked like if I didn't put a picture?

Let's talk about ingredients. 
  • The Italian sausage I got from Trader Joe's. It's actually chicken sausage instead of the traditional pork sausage. I got one package of sweet, and one of spicy. I used half of each to make approximately one pound. I froze the rest. I am good wife, hear me roar. 

  • The basil I picked from my "herb garden" - which consists of a new basil plant, an old, ugly basil plant, a tomato plant that hasn't bloomed in 4 months, a rosemary bush with spiderwebs in it, a mint plant with about 4 leaves, and some droopy sage. Here's some photos:
The new, beautiful, fragrant basil plant. I honestly use basil a lot, so it's nice to only spend the money on the plant.
The older, uglier basil plant. 
BONUS SUCCULENT
MawMaw Cascio liked these a lot too! 
  • When choosing a pasta sauce, if you want to be as healthy as possible, you should try to get organic sauce with no added sugar. This is the one I found:
I'm pretty sure MawMaw Cascio's recipe calls for like a whole cup of sugar, so this is wayyyy healthier.
Definitely not your great grandmother's, but healthier.

  • For the cheeses, I think I used TWICE as much as the recipe called for. If you like cheese, which you do because you aren't a monster, then plan on using a whole cup of each. Or more. No judgement here. Also, for health purposes, get the cheese made with skim milk. Anything that says "fat free" screams I'M NOT NATURAL so I don't buy it. Plus its GROSS.
    •  And since I'm a scientist, here's a nice article to read on fat intake and your diet. Fat is necessary for your body, so pick healthy fats instead of a "low fat or No fat" diet.
    • ANNND the article is from the Mayo Clinic. Which I think is funny -- because traditional mayo is really fatty!! lololololol  

Now that we've had a word about ingredients and a health lesson, let's get COOKIN!

  1. To begin, I readied my oven by turning it to 400 degrees. 
  2. Then I picked out a pan, and decided to use my Silpat, which is this crazy no stick thing. It wasn't really necessary. It also gave me more to clean. 
      3. Cut the spaghetti squash! If it has extraneous stemmage, cut the stem down. Then VERY CAREFULLY cut it in half lengthwise, like so:
Squash

Meet giant knife

carefullll....

So very careful.. 

WHEW IT'S DONE
No fingers were lost! 
     4. Clean out the gunk in the squash, just like you would a pumpkin!
So fresh and so clean, clean
      5. Put some olive oil on the fleshy part of the squash. I used one of those nice BBQ brushes to put       mine on evenly, but you could always use your finger! 

       6. Place the squash fleshy side down on your pan, put a little water on the bottom, and bake for 45-60 minutes
This is how much water I used. And yes it did seep under the mat and burn.
And yes it was a pain in the ass to clean. 
      7. While the squash is roasting, brown your sausage! Use a pretty big pan. 
TIP: I had to take my sausage out of the casing, so I cut it down the middle and squeezed it out.

This pack of sausage didn't have casing...but I tried to find it, and made holes in my weiners. 
Crumble it with your hands to brown in the pan!


      8. Add the sauce to the sausage. Did I mention to use a big pan?
Simmah down nah.
      9. In a bowl, combine the ricotta, mozzarella, and shredded basil.
ugh. I love cheese. 

SO GEWD
      10. Wait because your squash was huge is cooking SO SLOWWWW
That's twenty more minutes.
I guess I could clean up the dishes I already dirtied.
     11. When your squash is tinder, swipe right. But when your squash is tender, fluff out the insides of it with a fork and see the magic! IT LOOKS LIKE SPAGHETTI BUT IT'S NOT
Are those NOODLES?

The full fluff. 
      12. Fill your squash with lasagna layers! Sauce, Cheese, Repeat. Top with mozzarella.


      13. Turn on your broiler, and pop those bad boys in for a couple of minutes - until the cheese on top starts browning.
The Health Inspector is at it again.
      14. Marvel at the great beauty in front of you. Take pictures for your blog. Top with parmesan if you want. Then EAT.
ooooooooooooooo

ahhhhhhhhhhhh

parm is added to everything at our house

whoahhhhhhh 

Overall Thoughts About this Meal:

It was really good!! Like yum. Judson said it was "probably the best thing you've cooked." I will definitely make it again! 
The only bad thing about it was that there was a lot of water at the bottom of my squash bowl. I think next time I will take out the squash and for real layer everything in a 9x9 pan (squash, sauce, cheese). I think that will help with the moisture. 
Also, I just realized it was missing a garlic flavor! That's just bad form for an Italian. I'll either add some garlic salt in my layers (I added salt anyway), or add actual chopped garlic to my sausage browning process next time. Granny says that garlic keeps the worms away, so really it's a health concern.   


Concise Instructions:

Pre-heat oven to 400 degrees. Wash spaghetti squash, cut off stem and slice squash lengthwise. Scoop out the seeds and gunk. Brush with olive oil, season with salt and pepper, and place, cut side down, on your baking dish with a little water. Roast for 45-60 minutes. 
While squash is roasting, brown Italian sausage in large skillet over medium heat. Add sauce once brown.
In a bowl, combine the ricotta, mozzarella, and fresh basil, set aside.
Fluff squash innards.
Layer sauce and cheese until squash is filled. Top with mozzarella. 
Broil until cheese turns golden brown.


Hope you enjoyed this installment of Cooking {without} Class! Leave me a comment with questions and compliments. Obviously, there won't be any complaints. 


<3 Frankie


Sunday, October 18, 2015

Howdy!

Welcome to Frankie's Millennial Blog!

I will be setting up my blog over the next couple of days, and hopefully my first post will come soon! (Well, technically this is my first post, but let's talk about REAL posts, kk?)

I am a millennial, so I will be doing some young people things with this thang. OHHH ARE WE TALKING ABOUT SLANG, YALL? yes. I'll also be using some *bad words* every now and then, because it's true to my life. It also adds flavor, especially in the kitchen. This blog will hopefully be on fleek.

That is all!

Enjoy Bitches,

Frankie